Key takeaways
- Secure shade cloth at many points, not a few: a fixing every 60–90 cm (2–3 ft) spreads wind load and stops tearing.
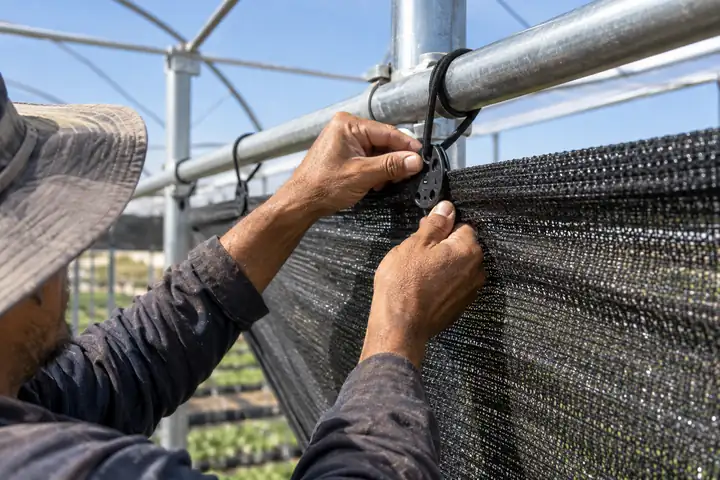
- Shade cloth clips grip anywhere on knitted cloth; grommets are best for prefinished panels and woven cloth.
- Use elastic ties or ball bungees, not rigid wire, so the cloth can flex in gusts.
- Mount cloth above the plants on a frame with open sides; draping it directly on foliage traps heat.
To secure shade cloth, fasten it to a rigid frame or cable at a point every 60–90 cm (2–3 ft) along every edge, using shade cloth clips or grommets with elastic ties, and tension it evenly so it does not flap. Start at the corners, work toward the middle of each side, and leave a small amount of give so gusts are absorbed by the ties rather than by the fabric.
Most shade cloth failures are installation failures: too few fixing points, rigid ties that tear the fabric, or a frame too weak for the wind load. This guide covers attachment hardware, frame design, raised beds and greenhouse installation. For choosing the cloth itself, see what percentage shade cloth to use and the greenhouse shade cloth guide.
How to attach shade cloth: clips, clamps or grommets?
There are three common ways to attach shade cloth to a frame. The right one depends on whether the cloth is knitted or woven and whether you cut it yourself.
| Method | How it works | Best for | Watch out for |
|---|---|---|---|
| Shade cloth clips | Plastic clip snaps onto the cloth anywhere, giving a tie-off hole | Knitted cloth cut on site; temporary or seasonal installs | Cheap clips go brittle in UV; use UV-stabilized clips |
| Shade cloth clamps | Spring or screw clamps grip cloth onto a pipe or rail | Fixing directly to hoops, pipe and greenhouse frames | Clamps must match pipe diameter; pad sharp edges |
| Grommets | Metal or plastic eyelets set in a reinforced hem | Prefinished panels, woven cloth, shade sails | Only as strong as the hem; avoid adding grommets in raw cloth |
| Lacing/batten strip | Cloth wrapped around a batten and screwed to timber | Permanent timber pergolas and shade houses | Hard to remove for winter |
| Wiggle wire / spring lock | Spring wire locks cloth into an aluminum channel | Greenhouses and hoop houses | Requires channel on the frame |
Grommeted shade cloth
Grommeted shade cloth, also sold as shade fabric with grommets, arrives with a hemmed or taped border and eyelets every 60–90 cm. It is the easiest option for retail buyers and garden projects because no cutting is involved. Order panels slightly smaller than the frame (about 10–15 cm or 4–6 in on each side) so you have room to tension with ties.
Shade cloth clips
Clips let you add a fixing point wherever you need one, which is ideal when you cut knitted cloth from a roll. Space them at the same 60–90 cm interval, and add extra clips at the corners and at any point where the cloth turns over a ridge. Clips work poorly on woven cloth that is not hemmed, because the cut edge can fray behind the clip.
How to hang shade cloth so it survives wind
Shade cloth acts like a sail. Even porous cloth catches significant wind load, and denser cloth (70–90%) catches much more. Follow these principles:
- Tension evenly. A loose cloth flaps and wears through at its fixings within a season. Pull it taut but not drum-tight.
- Use flexible ties. Bungee cord, ball bungees or UV-stable elastic cord absorb gusts. Rigid wire or cable ties concentrate stress and tear the fabric.
- Slope the cloth. A slight pitch (around 1:10) sheds debris and prevents water pooling in heavy rain.
- Leave an air gap. Hang the cloth at least 30–60 cm (1–2 ft) above plants in beds, and 1–2 m (3–6 ft) above crops in larger structures, with open sides for airflow.
- Remove or roll up before storms. In hurricane or typhoon forecasts, removing shade cloth is cheaper than replacing a frame.
DIY shade cloth frame: poles, spans and materials
A good DIY shade cloth frame carries the cloth plus wind load without bending. Typical options for shade cloth structures for gardens:
| Frame type | Typical post / hoop spacing | Notes |
|---|---|---|
| Galvanized steel pipe (25–42 mm) | 2.5–3 m (8–10 ft) | Strong and long-lasting; the standard for shade houses |
| Timber posts (90 × 90 mm / 4 × 4 in) | 2.4–3 m (8–10 ft) | Easy to build; batten or screw cloth along top rails |
| PVC conduit hoops (20–25 mm / ¾–1 in) | 0.9–1.2 m (3–4 ft) | Lightweight; good for low tunnels and raised beds |
| EMT conduit hoops | 1.2–1.5 m (4–5 ft) | Stronger than PVC; bent with a hoop bender |
| Cable and post system | Posts 4–6 m with tensioned cable | Covers wide spans; needs anchored end posts |
For shade cloth poles, set posts at least 60 cm (2 ft) deep, deeper in soft soil or exposed sites, and brace end posts diagonally or with ground anchors, because the end posts take the full pull of the tensioned cloth. Where loads are significant (large spans, livestock shade, public areas), have the structure checked by a qualified builder.
Worked example: covering a 6 × 12 m garden
- Cloth area: 6 m × 12 m = 72 m² (about 20 × 40 ft).
- Posts at 3 m spacing along the long sides: 12 ÷ 3 = 4 bays, so 5 posts per side, 10 posts total, plus one center line of 5 posts if the cloth is not cabled across.
- Perimeter fixings at 75 cm spacing: perimeter = 2 × (6 + 12) = 36 m; 36 ÷ 0.75 = 48 fixing points.
- Order a panel or cut length about 0.3 m smaller than the frame in each direction to allow tensioning, or a roll width that matches your span.
Shade cloth for raised garden beds
Shade cloth for raised garden beds is one of the simplest and most effective DIY shade for plants:
- Fix PVC or EMT hoops to the inside of the bed every 0.9–1.2 m, using pipe straps or short lengths of larger pipe as sleeves.
- Add a ridge pole along the top of the hoops with clamps or zip ties to keep spacing even.
- Drape the cloth over and secure it to the hoops with shade cloth clamps (snap clamps sized to the pipe).
- At the ends, either leave open for airflow or gather and tie to a stake.
- Leave the sides able to roll up so you can harvest, and so pollinators can reach fruiting crops.
The same hoops can carry insect netting in spring and shade cloth in summer. Insect netting needs to be sealed at the soil line, while shade cloth should be lifted to let air circulate (see the insect netting guide).
Installing greenhouse netting and shade cloth
Greenhouse netting covers both shade cloth over the roof and insect screens on vents and doors. Good practice:
- Exterior roof shade sits on the outside of the glazing, ideally on a few centimeters of standoff so air flows between cloth and roof. Fix along the ridge and eaves with clamps, wiggle-wire channel or ties to purlins.
- Retractable interior shade runs on wires inside the house and can be drawn open on cloudy days. It reduces light but less heat, because energy has already entered.
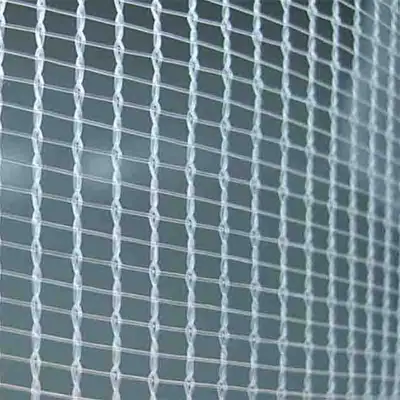
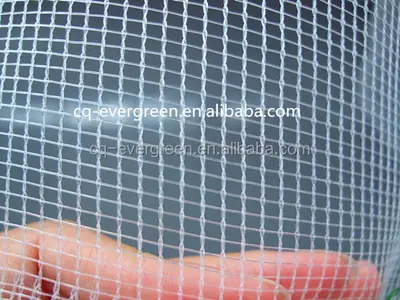
- Vent screens with fine insect mesh such as 100% Virgin Plastic Anti-Hail Mesh Net for Greenhouse must be sealed on all edges; any gap defeats them.
For woven PP cloth such as our Agricultural Sun Shade PP Polypropylene Black UV, allow for slight shrinkage in the first weeks of sun and re-tension after a few days. In hail-prone areas, a rigid layer such as hard plastic mesh for hail protection can protect vents and small structures (see hail netting for gardens and greenhouses).
Common mistakes when securing shade cloth
- Too few fixing points. Four corner ties on a large panel will tear the corners in the first storm.
- Cutting woven cloth without sealing the edge. Heat-seal or hem it, or use knitted cloth.
- Draping cloth on plants. Heat builds up and leaves scorch where the cloth touches.
- Using indoor-grade clips or cord. Anything left outside needs UV-stabilized plastic or stainless/galvanized metal.
- Ignoring snow. Shade cloth sheds rain but can hold wet snow. Remove it for winter in snowy regions.
Supplying installers and garden retailers
EGP makes agricultural netting in Yantai, China for distributors, garden centers and farm-supply businesses. We can supply shade cloth by the roll or cut to size, with hemmed edges and grommets on request. See the Hail, Shade & Insect Nets range, browse all products, or request a quote.
Frequently asked questions
How do you secure shade cloth without grommets?
Use shade cloth clips, which snap onto the fabric anywhere and provide a tie-off point, or clamps that grip the cloth directly onto pipe. Space fixings every 60–90 cm along the edges and tie them to the frame with bungee or elastic cord so the cloth can flex in wind.
How far apart should grommets be on shade cloth?
Grommets are typically spaced every 60–90 cm (2–3 ft) along the edges, with one at each corner. Closer spacing spreads load better on large panels or windy sites. The hem or reinforcing tape behind the grommets matters as much as the spacing.
How high should shade cloth be above plants?
Hang shade cloth at least 30–60 cm (1–2 ft) above plants in raised beds and 1–2 m (3–6 ft) above crops in larger shade structures. The air gap lets heat escape and prevents leaf scorch where cloth touches foliage.
Can I put shade cloth directly on plants?
Only for short periods, such as a day or two of protection for transplants. Shade cloth laid on foliage traps heat and can scorch leaves. Use hoops, stakes or a frame to keep it off the plants.
What is the best way to attach shade cloth to a wooden frame?
For permanent installations, wrap the edge of the cloth around a timber batten and screw the batten to the frame, which spreads the load along the whole edge. For seasonal cloth, use grommets or clips with screw eyes and bungee ties so it can be removed in winter.
Do I need to take shade cloth down in winter?
In most climates it is worth removing shade cloth in autumn: plants need the extra winter light, and snow and ice can overload the cloth and frame. Storing it dry and out of the sun also extends its life.